A while back I blogged about Veeam Endpoint https://msandbu.wordpress.com/2014/12/01/veeam-endpoint-backup-a-new-free-backup-solution-for-computers-and-physical-servers/ while it is aimed at Physical computers / servers it has another purpose that I just discovered.
In Azure, Microsoft has currently a preview feature called Azure VM backup, which in essence is a image based backup of virtual machines in Azure. Now since this currently has alot of limitations I figured what other options do we have?
While some people do Windows Server Backup directly to another Azure VM disk, I figured why not give Veeam a try with Data disk and use it in conjunction with SMB files. The reason why is that we can use Veeam Endpoint do to backup to an data disk (which is attached to an individual VM) then create a task to move the backup to an SMB files store (in case the virtual machines crashes or is unavailable we have the backup on an SMB file share and that makes it accessable for all other virtual machines within that storage account. NOTE: Doing Veeam backup directly to SMB file shares is not working
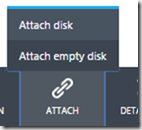
So we create a virtual machine in Azure and then use the portal to attach an empty data disk for the virtual machine
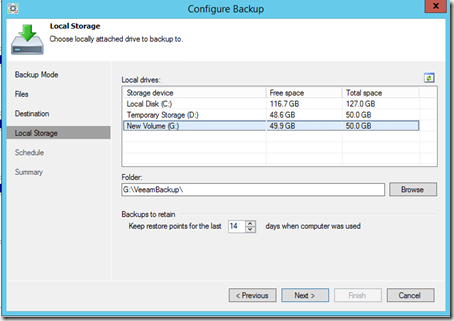
This new disk is going to be the repostiory for Veeam Endpoint within the VM
SMB files is a SMB like feature which is currently in preview and is available for each storage account. In order to use it we must first create a SMB file share using PowerShell
$FSContext=New-AzureStorageContext storageaccount storageaccountkey
$FS = New-AzureStorageShare sampleshare -Context $FSContext
New-AzureStorageDirectory -Share $FS -Path sampledir
After we have created the fileshare we need to add the network path to the virtual machine inside Azure. First we shold use CMDkey to add the username and password to the SMB file share to that it can reconnect after reboot
cmdkey /add: storageaccountpost.file.core.windows.net /user:useraccount /pass:<storage Access Key>
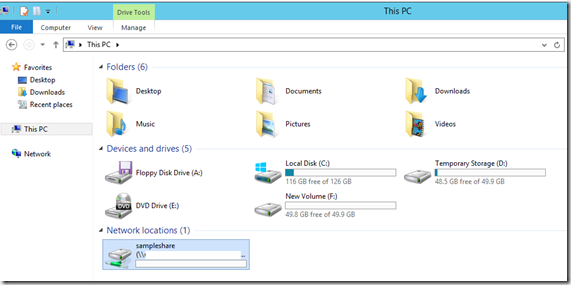
And then use net use z: \storageaccount.file.core.windows.netsampleshare
After the network drive is mapped up, we can install Veeam Endpoint.
Now Veeam Endpoint is a free backup solution, it can integrate with existing Veeam infrastructure such as repositories for more centralized backup solution. It also has some limitations regarding application-aware processing but works well with tradisional VMs in Azure.
After setup is complete we can setup our backup schedule
Then I run the backup job. Make sure that the backup job is run correnctly, not that as best-pratice is not to store any appliaction or such on C: drive, I also got VSS error messages while backing up data on c: therefore you should have another data disk where you store applications and files if neccessery.
Now after the backup is complete we have our backup files on a data disk that is attached to a virtual machine. We have two options here in case we need to restore data on another virtual machine.
1: We can run the restore wizard from the backup files on another virtual machine against the copied backup files on the SMB file share
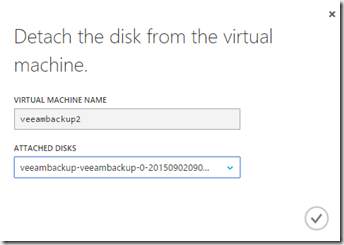
2: Deattach and reattach the virtual disk to another virtual machine.
this is cumbersome to do if we have multiple virtual harddrives
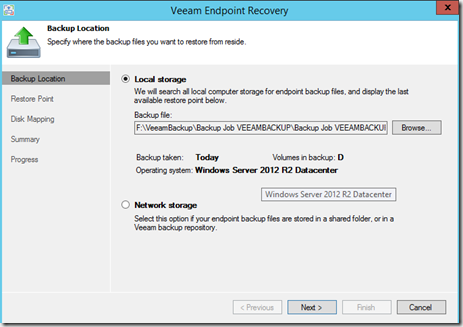
Now the attaching a virtual disk is done on the fly, when we run the restore wizard from Veeam, the wizard will automatically detect the backup volume and give us the list of restore points available on the drive
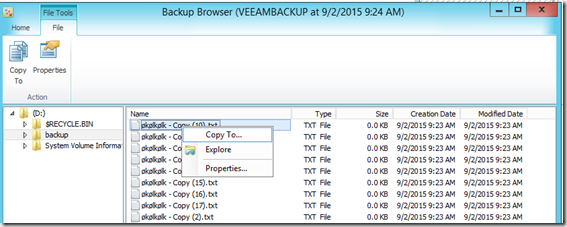
Note that while running the file recovery wizard does not give us an option to restore back directly to the same volume, so we can only copy data out from a backup file.
Well there you have it, using Veeam endpoint protection for virtual machine in Azure against a data drive. After given it a couple of test runs I can tell its working as intended and gives alot better functionality over the built-in windows server backup. If you want to you can also set it up with Veeam FastSCP for Azure and allowing it to download files from Azure VMs down to an on-premises setup.

