Yesterday Citrix announced a Tech Preview of a XenDesktop 7.5 Gallery image for Azure Pack.
For those so not familiar with Azure Pack, this is a portal which builds upon System Center (and some other tools) do deliver an Azure-like portal where you can setup some of the features like Azure does. I’ve blogged about it before if you want to know more about it here –> http://msandbu.wordpress.com/2013/06/28/azure-pack-configuration-for-windows-server-2012-r2/
Now a Gallery Image is where a end-user want to provision a new-service, he can either choose custom create of choose a finished Image from the gallery.
(A copy from the Azure Gallery)
Now imaging giving customers the ability to provision XenDestkop resources as they need it. Or just for the IT-guys to have a streamlined process of doing it. This is where the XenDesktop gallery image comes in.
Now what do we need to setup this image ?
* Windows Azure Pack
* Server 2012 R2 image sysprepped
* XenDesktop 7.5 Media
* The XenDesktop Gallery Image
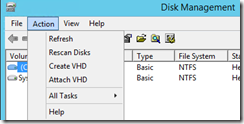
Then we need to do alot of changes, first we need to create a new VHD which will contain the setup files. First go into disk management and create a new VHD (Which needs to be 4GB) which is called XenDesktop.vhd
After you created the VHD, mount it using Explorer and copy the content from the 7.5 ISO to the VHD file.
When you are done with this, go into the Virtual Machine Manager console, the into the library node and then click import physical resources.
Then choose “add resources”, select the XenDesktop.vhd then select which library server and destionation to store the VHD file. After it is finished importing right-click on it and choose properties. The set Famility to CitrixXenDesktopMedia, and then set the release to 7.5.0.0 and lastly set the operating system type to “none”
Then Click OK, after we are done with this we need to modify our operating system disk image. Does this need to be VHD ? YES! Azure Pack does not support VHDX. ) and it needs to be fixed)
Right-click on the sysprepped VHDX file and choose Properties, from there alter the Famility to which type of operating system it is running, in my case its
”Windows Server 2012 R2 Datacenter”
and set the release to 1.0.0.0 and then of course change the Operating System to Windows Server 2012 R2 Datacenter as well.
Click OK after you are done. Next we need to “tag” the virtual disks so that the gallery item can use to find the vhds.
Open up Virtual Machine Manager PowerShell console. Run the following command,
$myVhd = Get-SCVirtualHardDisk | where {$_.Name -match ‘sysprepped’} “Make sure that the name matches the name of your VHD file)
$tags = $myvhd.tag
$tags += “WindowsServer2012”
Set-scvirtualharddisk -virtualharddisk $myVHD -Tag $tags
$myVhd.Tag (This spits out the info so you can see that the tag is applied)
Now we need to import the Gallery image extention to the Library share, this can either be done by using the GUI or the PowerShell.
PowerShell
$libraryShare = Get-SCLibraryShare | Where-Object {$_.Name -eq ‘MSSCVMMLibrary’}
$resextpkg = “C:Usersadministrator.CONTOSODownloadsXenDesktopRole.resextpkg” (Here the path needs to be changed to where the resextpkg is located)
Import-CloudResourceExtension -ResourceExtensionPath $resextpkg -SharePath $libraryShare
Next we need to enter Azure Pack – admin site. Go into VM Clounds and Gallery and choose Import.
From here add the XenDesktopRole.resdefpkg, and verifies that it actually imports.
Next we need to make this item, public and add it do some different plans.
Go into the item and choose Make Public, then assign to some plans. If you don’t have any plans you need to create some from the plans menu pane within the Admin site.
So what now ? Open the Azure Pack site as and tenant which is enabled for the plan and choose from Gallery and see for yourself.
Then click next (From here the OS “sysprepped” image should appear and you need to have a virtual network in place before you can continue on here .
Next we can define which role this VM should have, and we can setup a XenDeskTop Controller but we still need to create the site after VM creation. But we can also deploy StoreFront, LicenseServer, Session Host and Desktop Director
Pretty cool!


