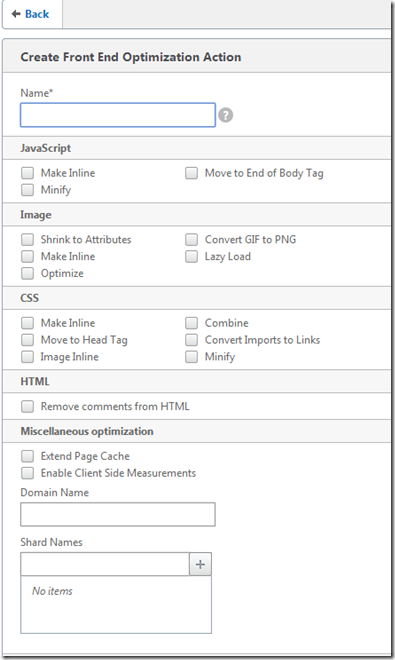
One of the new features in Netscaler 10.5 is called Front-End optimization (which actually is part of Netscaler enterprise and +) which allows Netscaler to optimize the HTTP traffic which is headed back to the client. Now let us take a look at some of the different settings.
Now first of we have the JavaScript section.
* Make Inline (This makes JS which are linked to a page to become inline instead, only affects JS which are less then 2 KB)
* Minify (Removes Whitespaces and comments from JS)
* Move to end of body tag (Moves a inline Javascript to the end of a body tag
Images
* Shrink to attributes (Shrinks an image to the specified size as the HTML tag
* Make inline (This makes Images which are linked to a page to become inline instead, only affects images which are less then 2 KB)
* Optimize (Removes non-image data from JPEGs, such as comments)
* Convert GIF to PNG (converts images from GIF to PNG)
* Lazy Load (Downloads images as a user scrolls down to them)
CSS
* Make Inline (This makes CSS files which are linked to a page to become inline instead, only affects CSS files which are less then 2 KB)
* Combine (Converts multiple CSS files into one)
* Move to head tag (Moves CSS defined in the body tag to the head tag)
* Image inline (Makes such as CSS backgrounds referenced in the CSS file as inline)
* Convert Imports to Links (Convert CSS import statements to HTML link tags)
* Minify (Removes Whitespaces and comments from JS)
HTML
* Remove Comments from HTML (Removes comments within the HTML files)
Extend Page Cache (
Enable Client side Measurements
Now you can take a look at how HTML will look after it is parsed trough this feature here –> http://support.citrix.com/proddocs/topic/ns-optimization-10-5-map/ns-feo-working-use-case.html
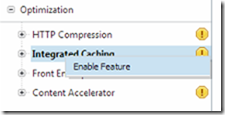
Now that you have some understanding on what it does, let’s go ahead and configure it. First we need to enable the feature and Integrated caching (since this is a prerequisite)
Enable both features
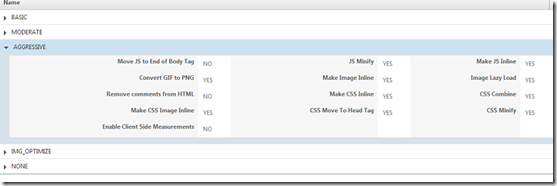
Now by default there are some premade actions, which define what options are enabled. For intance aggresive policy have most of the optimizations enabled.
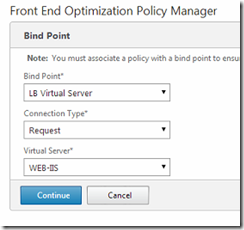
Now for instance, lets say that we have a prefined load balanced server (which in my case is hosting a WordPress site) the vServer is called WEB-IIS in my case, go into Front-End Optimization –> Policy Manager –>
Here choose bind point, and virtual server
Next we need to bind a policy to the bind point. Remember that here we need to create a policy using an expression and attach it to the bind point.
I used HTTP.REQ.HOSTNAME expression here so in my case when a user accesses demo-webopt the user will be affected by the policy.
After you have added the policy, press OK then DONE and you are good to go.
So try to access the page and watch the statistics.
Now we can see that it has already managed to do some optimization after I tried to access the page a couple of times.
So with this feature it allows web-developers to be able to comment inline code without affecting the users, also being able to have a solid structure on CSS and JS without affecting the performance. Note that this feature is not suitable for all web applications, be sure to properly test the feature first.


