So the purpose of this post is to post different tips and tricks with Netscaler, so this is going to be updated from time to time. So it’s what I call a dynamic post ![]()
Now there are a tons of different areas to explore here, but im going to start easy.
1: Password reset Netscaler MPX / VPX
Now from time to time you might come by this, you have a customer which has a Netscaler setup and they have forgotten the password for the device. What do you do ?
If you have a MPX you need to connect to the device using a serial cable and use for instance Putty to connect to the serial port. If you have an VPX you just need to open the console. Now when the device boots you need to press CTRL + C now on the VPX it is simple the boot menu appears
Then you just press 4 and go into single user mode. On the MPX we have to press CTRL + C simultaneously as well when the following appears in the console
Press [Ctrl-C] for command prompt, or any other key to boot immediately.
Booting [kernel] in 2 seconds…
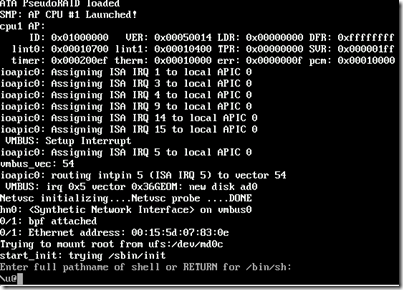
Now to start the MPX in single-user mode you have to type either boot –s or reboot — -s to restart in single user mode. When you are in single user mode the console will look like this.
Next we have to mount the flash device since this is where the config file resides. Now on different devices this flash device has different names http://support.citrix.com/article/CTX121853
For VPX this device is called /dev/ad0s1a
So first we have to check disk consistency first before we can mount the device.
fsck /dev/ad0s1a (This checks disk consistency)
mount/dev/ad0s1a/flash (This mounts the drive under the folder /flash )
df –l (List the devices and where they are mounted)

Next we need to change directory to the flash drive where the config file is located.
cd /flash/nsconfig from there
Next we use a grep command to create a new config file but without the line which contains the passoword string.
grep –v “set system user nsroot” ns.conf > new.conf
Next we need to rename the current config to another name
mv ns.conf old.ns.conf
mv new.conf ns.conf
After this is done we have a new config file without the password for nsroot and we can reboot.
2: Use of profiles
A feature that I don’t see so commonly used and I think that is because of its not a obvious known feature, so let’s change that. When setting up virtual services you have the option to define a network profile attached to this service.
For instance the netscaler has many built-in TCP profiles which can help with improving the perfomane on a service either over LAN or WAN. These profiles tune different settings on the TCP stack and a desricption for each TCP profile can be found here –> http://support.citrix.com/proddocs/topic/ns-system-10-map/ns-ac-confg-tcp-profl-tsk.html
For instance on virtual services you have an profile pane where we can define which Profile to use.
If for instance you are using this only in a LAN you should use the nstcp_lan_profile. By changing this you will note the performance increase it has.
3: Change GUI on Gateway portal
Now in many cases you want to customize the GUI of the default Netscaler Gateway Vserver.

Now this is possible but not as easy as with Storefront… ![]()
First of we need to do some changes within the Netscaler Gateway GUI.
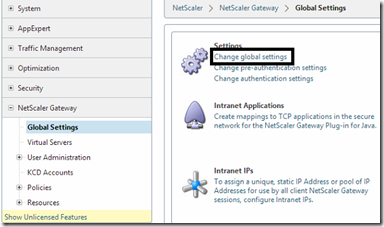
Change setting to Green Bubble under global settings on a Access Gateway vServer (if you want to use it as an template)
Then we can make customizations, we can do this by opening for instance a FTP connection to the netscaler (with for instance winSCP) The gui is located under /netsacler/ns_gui
Changes which are done here can be viewed in real-time.
For instance if we wish to change the background image we can add a new image to the folder /var/netscaler/gui/vpn/media by added a new image by the name bg_bubbles.jpg to replace the old background. (Now I’ve changed it with a picture from the familiy album.
If we wish to change the text that appears in the portal we can change this under /vpn/resources/en.xml (This file contains most of the text that appears in the portal.
So after a few changes here we can get this.
Now if we want to same this custom theme, we first need to create a folder called ns_gui_custom under the /var/ folder.
This can in shell by writing mkdir /var/ns_gui_custom
Next change directory to /netscaler by typing: cd /netscaler
Now we to archive the ns_gui folder: tar -cvzf /var/ns_gui_custom/customtheme.tar.gz ns_gui/* This is because when the netscaler boots it exports the tar file to the nsgui folder.
After this is done we need to change the vServer global settings to custom theme and reboot to make sure it applies properly ![]()
4: Trouble with VIP in a DMZ site
So you have a two armed Netscaler solution where you have a SNIP, NSIP in the LAN network which talk to your backend servers and AD and DNS as such, and then you setup a VIP in the DMZ sone where you host your Access Gateway vServer, you reckon it should work.
But you are unable to ping the VIP address and you are uanble to open the vServer HTTPS.
You can see that the Default Gateway is going trough the LAN interface and when you want to change the gateway you get this error
The solution you need to have a SNIP address in the DMZ sone with the VIP address, this is because a VIP address is not “fully” features network IP unless it has a SNIP on the same network.


