
Since I said in my previous post that I’m working on the whole System Center package ( and I’m getting tired of blogging about SCCM, I thought I would start a bit on SCOM (Operations Manager) ![]()
Much has changed since the previous version SCOM 2007 R3 CU5 (Which I believe was the last release )
A lot of new features has entered, including:
* SNMP v3 support ( The previous versions supported only v1 & v2 )
* More PowerShell cmdlets
* Removal of the RMS role (Which was introduced in 2007 ) so all servers are now management servers and distribute the load between the MS servers, which gives HA out-of-the-box
* Agent Control panel applet
* More support Network devices and protocols (Including CDP and LLPD)
* More support for web applications J2EE, .Net
And remember that SCOM consists of the following
* Management Server
* SCOM DB
* SCOM Data warehouse DB
* Gateway Server
* ACS
* ACS Database
* Agent
* Console
* Web Console
* Reporting Server
* Management Packs
* Agents
Now that we covered the basics, we start by installing it.
PS: Remember to install .Net framework 3.5.1
After I start the setup of the SCOM 2012, I get the option to choose what I want to install, in this case since I only have 1 server I choose Management + Console

Next is about installation location, leave it at the default.

Next the setup, verifies that you have the required hardware & software in order to run OpsMgr.
In my case I forgot to update my server to2008 R2 SP1 and I forgot to install the Report Viewer Controls.

Of course those are pretty easy to fix. (Can’t figure out thou why Microsoft couldn’t put the setup for Report Viewer on the installation media ) So after you’ve installed SP1 and installed the Report Viewer Controls run the setup again.

Now that’s done I can continue with the setup, next you create a management group.
This is unique for each instance of OpsMgr so choose a unique name if you have muliple instances.

Click next, accept the license terms.

Then Click next again, now we come to the DB setup.
Enter the name of your SQL server, and the setup will automatically connect to it.
And will by default try to store the database on the C: drive of the SQL server, to change that to another disk (Pref NAS/SAN)

Next we get another database setup, but this is regarding the Data warehouse DB, this is the database that the
reporting services uses & for the long term data storage.

After you are done here, click next. Now we get to the service account setup screen.
A little info about the different accounts.
Management server action account:
This account is used to carry out actions on monitored computers across a network connection.
This should be a domain account, which has local administrative rights.
System Center Configuration service and System Center Data Access service account
This account is one set of credentials that is used to update and read information in the operational database. Operations Manager ensures that the credentials used for the System Center Data Access service and System Center Configuration service account are assigned to the sdk_user role in the operational database.
This can be either a domain account or run as local system. For cases where the operational database is hosted on a remote computer that is not a management server, a domain account must be used. For security reasons, don’t use the same account as the MSAA.
Data Warehouse Write account
The Data Warehouse Write account writes data from the management server to the Reporting data warehouse and reads data from the operational database.
This account is assigned write permissions on the Data Warehouse database and read permissions on the operational database.
Data Reader account
The Data Reader account is used to define which account credentials SQL Server Reporting Services uses to run queries against the Operations Manager reporting data warehouse.
Ensure that the account you plan to use for the Data Reader account has SQL Server logon rights and Management Server logon rights.
After you have created the domain accounts, enter the username and passwords click next.

Since I choose a domain admin account as my operating manager server action account I got a warning from the installed that this is not recommended. But as I said before, it’s a demo in a closed environment no harm there ![]()
Next we have the help improvent and error reporting (choose whatever you want there)

Next we have Microsoft update, since we are using SCCM to do patch management I turned this off.

Click next and you get the summary screen, double-check the information here that click install.
And then the waiting begins. If you want you can check the logs that the setup stores under C:users(runninguser)appdatalocalscomlogs and the OpsMgrSetupWizard.log
When the setup is finished, mark the “Start the console” and close the installer.

Now we are in the console, OpsMgr automatically says that there are tasks that we need to do before we can manage and monitor our network. First thing is that I want to push the OpsMgr information out to Active Directory so that our agents can find what Management Group & Server they need to connect to (of course we don’t need to publish that information in AD, if we want we can manually type that in under the setup parameters of the agent. )
This step needs to be performed as a user with domain rights.
Open the installation media on OpsMgr on a domain controller. Browse to SUPPORTTOOLSI386 then open MOMADADMIN via cmd. What this tool does it that It
creates an Operations Manager container under the root of the domain specified,
Creates a container under the Operations Manager container the tool just created with the name of the management group specified.
Within the management group container, the tool creates two service connection points (SCP) and one security group.
The syntax is: MomADAdmin ManagementGroupName MOMAdminSecurityGroup RunAsAccount Domain
Example: MomADAdmin MyManagementGroup contosoMOMAdmin contosoActionAccount Contoso
So in my instance MomADAdmin TEST_MG testMOMadmin testadministrator test
Note thou, this only creates the folder in AD, I doesn’t add the Management servers, so the agents still don’t know which server it should contact.
Now we have to enter the console,
Go into the administration tab and into Management Servers, –> right click on the server (which is a MS) and press properties.

Next click the Add button under “Auto Agent Assigment”

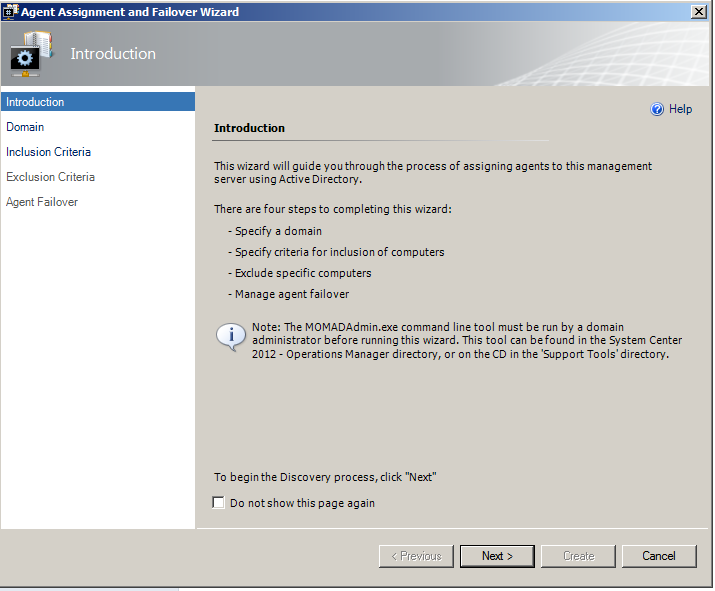
Now we come to the Agent Assigment and Failover Wizad,
as you can see here it says that the Momadadmin has to been run before you can continue this wizard.

Click next, Select the domain of the computers from the Domain name drop-down list.
Set Select Run As Profile to the Run As profile associated with the Run As account that was provided when MOMADAdmin.exe was run for the domain. The default account that is used to perform agent assignment is the computer account for the root management server, also referred to as the Active Directory Based Agent Assignment Account. If this was not the account that was used to run MOMADAdmin.exe, select Use a different account to perform agent assignment in the specified domain, and then select or create the account from the Select Run As Profile drop-down list.

On the Inclusion Criteria page, either type the LDAP query for assigning computers to this management server in the text box.
The following LDAP query returns computers with a name starting with scom, (&(sAMAccountType=805306369)(objectCategory=computer)(cn=scom*))

On the Exclusion Rule page, type the fully qualified domain name (FQDN) of computers that you explicitly want to prevent from being managed by this management server

On the Agent Failover page, either select Automatically manage failoverand click Create or select Manually configure failover.
Now remember that It can take up to one hour for the agent assignment setting to propagate in Active Directory Domain Services.

Since it might take some time, we are going to install the agent manually, but before we can do that we have to change the security settings for the scom site.
Because by default, SCOM rejects manually installed agents. So therefore go into Administration tab ->

Click the Security tab, and press properties. Here change the value from Reject to automatically approve.

Then click OK. After that is done, go to the server that you want to agent to be installed. And run this command in a cmd shell as administrator.
Installing the agent:
%windir%system32msiexec.exe /I dirmomagent.msi /qn USE_MANUALLY_SPECIFIE_SETTINGS=1 MANAGEMENT_GROUP=TEST_MG MANAGEMENT_SERVER_DNS=scom.test.local
NOTE: That the dir here is the installation media of scom
NOTE: Active Directory Integration is disabled for agents that were installed from the Operations console. By default, Active Directory Integration is enabled for agents installed manually by using MOMAgent.msi.
After the installation it might take some time before the agent appears in the console, when it does it will appear, under the administration and Agent Managed tab.

You can also check the control panel applet on the server, this displayed info about the agent.
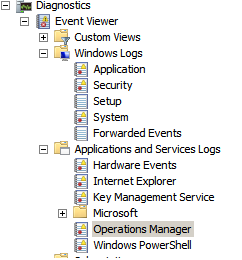
And under the event log under Windows logs –> Applications and services logs –> Operations Manager –> and se if you have any error messages appear.

When it is finished and you have no error messages, to into the console again, monitoring -> Windows Computers -> you will see the agent appears as Healthy here. So it seems like the agent is working as it should.

By the way, the server I installed was an SQL server. By default SCOM doesn’t contain anything useful to monitor SQL servers. Therefore we need to download a management pack for SQL server 2008, inorder for SCOM to manage the server properly.
A Management Pack is a file that contains parameters, values, task, rules, monitors for a known product. So they contain all the information that scom needs to monitor a certain product.
Microsoft has a lot of free management packs avaliable (for free) for download via their online library. (There are other 3 party vendors also that have published management packs for their products on the website but these usually costs $$)

Next I choose to search the online catalog, and I search for the name “SQL”
And a number of Management Packs appear, and I choose the SQL 2008 server MP.


I choose Add all of these and download them to the desktop of my server.

Now after we downloaded them , we have to import them into the OpsMgr site.
Go back to the management pack pane under administration. And on the right side click “import Management Packs”
And browse to those you’ve downloaded and click install.

After you’ve done that, another view called SQL server will appear under the monitoring tab ( which was a part of the MP you installed )

After OpsMgr has updated the database, and distributed the new SQL MP to the agent, the server will appear here.

As you can see that It appears with a critical event, but we will go deeper into the events and rules in a later blog post ![]()
Part 1 done!