Starting of the new year with a long awaited feature on my part, setting up integration between XenDesktop and Microsoft Azure which is now a supported integration in 7.7 which was released now a week ago. This integration allow us to provision virtual machines directly from Studio. NOTE: Important to note however that XenDesktop as of now only supports V1 (Classic) virtual machines in Azure, so no Resource Groups yet, which might make it a bit confiusing for some but ill try to cover it as good as I can.
But a good thing with this is that we can either setup XenDesktop in a hybrid setting where we have the controller and studio running from our local infrastructure or that we are running everything in Azure which is also another setup.
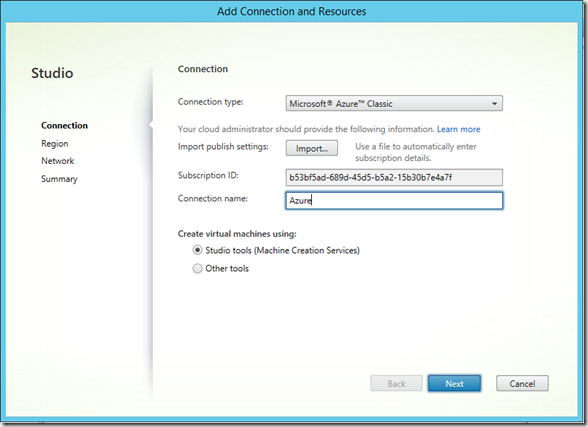
Now after setting up XenDesktop 7.7 you have a new option when setting up a new connection now, you need to get publish information from Azure before continuing this wizard, that can be downloaded from https://manage.windowsazure.com/publishsettings
Important that when downloading a publish profile that the subcribtion contains a virtual network (Classic virtual networking) within the region we choose later in the wizard, or else you will not be able to continue the wizard.
This can be viewed/created from the new portal under the “classic” virtual network objects
Now after verifying the connection profile you will get an option of different regions available within the subscription.
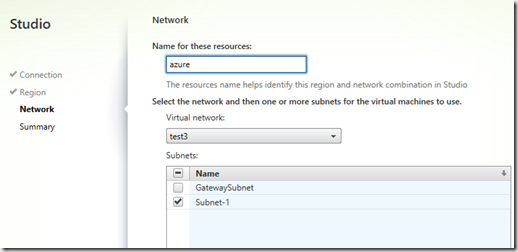
After choosing a region the wizard will list out all available virtual networks within the region, and will by default choose a subnet which has valid IP-range setup.
NOTE: The other subnet is used for Site-to-site VPN and should not be chosed in the wizard.
This part just defines which virtual networks the provisioned machines are going to use. So after we are done with the wizard we can get started with the provisioning part. Now in order to use MCS to create a pool of virtual machines in Azure we need to create an master image first. This can be done by creating a virtual machine within Azure, installing the VDA, doing any optimization, installing applications and doing sysprep and shutting down the virtual machines. Then we need to run PowerShell to capture the image. The reason for this is that the portal does not support capturing images in a state called specialized.
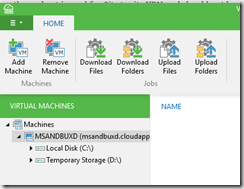
NOTE: A simple way to upload the VDA agent to the master image virtual machine is by using for instance Veeam FASTSCP for Azure, which uses WinRM to communicate and be able to download and upload files to the virtual machine.
DONT INSTALL ANYTHING SQL related on the C: drive (Since it uses a read/write cache which might end up with a corrupt database, and don’t install anything on the D: drive since this is a temporary drive and will be purged during a restart.
A specialized VM Image is meant to be used as a “snapshot” to deploy a VM to a good known point in time, such as checkpointing a developer machine, before performing a task which may go wrong and render the virtual machine useless. It is not meant to be a mechanism to clone multiple identical virtual machines in the same virtual network due to the Windows requirement of Sysprep for image replication.
ImageName = the image name after the convertion
Name = virtual machine name
ServiceName = Cloud service name
Also important that the vmimage HAS NOT other data disks attached to it as well. After the command is done you can view the image within the Azure Portal and you can see that is has the property specialized
Also with this you also now have a master image which you just need to allocate and start when the need for a new update to the master image is needed.
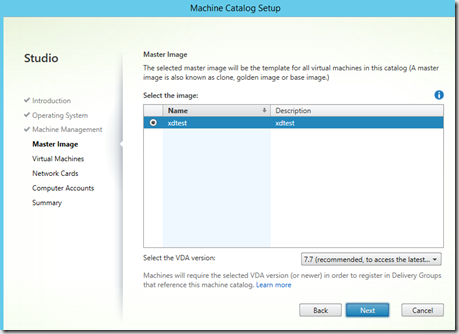
So now that the image is in place, we can start to create a machine catalog. When creating a catalog, Studio will try to get all specialized images from the region that we selected
Then we can define what kind of virtual machines that we can create.
NOTE: Citrix supports a max of 40 virtual machines as of now)
Basic: Has a limit of 300 IOPS pr disk
Standard: Has a limit of 500 IOPS pr disk, newer CPU.
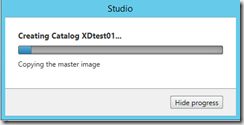
We can also define multiple NIC to the virtual machines, if we have any and select what kind of virtual network it should be attached to. Note that the wizard also defines computer accouts in Active Directory like regular MCS setup, so in order to do that we need to have either a S2S VPN setup so the virtual machines can contact AD or that we have a full Azure setup( site to site setup here –> https://azure.microsoft.com/en-us/documentation/articles/vpn-gateway-site-to-site-create/) After that we can finish the wizard and Studio will start to provision the virtual machines.
NOTE: This takes time!
Eventually when the image is finished creating the virtual machine you will be able to access the virtual machines from a IP from within the Azure region. Stay tuned for a blogpost, involving setting up Azure and Netscaler integration with 7.7

